ここまで、Visual Studio 2022 を使ってVisual Basic でプログラミングをしてきました。度々、ネット検索やマイクロソフトのヘルプ・ドキュメントでVBの関数やメソッドについて調べてきました。それらを、もっと分かり易く ここにまとめておこうと思います。
引数
デバッグで引数を渡す

線香 ギフト 贈答用 日本香堂 宇野千代の線香 特撰淡墨の桜 8小箱塗箱入 お線香 お供え 喪中見舞い 喪中はがき お歳暮 新盆見舞い 初盆 お盆 お供え物 お中元 お彼岸 進物線香 供物 微煙
メニューでデバッグ(D) -> xxxx のデバッグ・プロパティ
出て来た画面のコマンドライン引数 に渡したい引数を記述します。

引数を受け取る
Sub Main(args As String())
        Debug.WriteLine(args.Length)
        Debug.WriteLine(args(0))
.Length は、引数の数を返します。 引数は args(0) のように配列変数に入ります。
1        <---  args.Length
c:\SumByDay\All_Data\TradeRecordList(12).csv   <--- args(0)
Windows Form
Form上に配置した、Button や Label 等のControl を探して、見つかったControl のプロパティを操作する事が出来ます。
Control を探す
次のような、Shared Function を記述します。
   Public Shared Function FindControl(ByVal hParent As Control, ByVal stName As String) As Control
        ' hParent 内のすべてのコントロールを列挙する

        For Each cControl As Control In hParent.Controls
            ' 列挙したコントロールにコントロールが含まれている場合は再帰呼び出しする
            If cControl.HasChildren Then
                Dim cFindControl As Control = FindControl(cControl, stName)

                ' 再帰呼び出し先でコントロールが見つかった場合はそのまま返す
                ' If Not cFindControl Is Nothing Then
                If cFindControl IsNot Nothing Then
                    Return cFindControl
                End If
            End If

            ' コントロール名が合致した場合はそのコントロールのインスタンスを返す
            If cControl.Name = stName Then
                Return cControl
                Exit Function
            End If
        Next cControl
        Return Nothing
    End Function
使い方は、以下のような A - J のラベルが Label1 ~ Label10 のコントロール名であるとすると
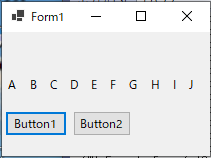
Dim RedYellowLabel As Control = FindControl(Me, “Label” + i.ToString) とすることで、i が 1から10まで変化すると、 RedYellowLabel は、 Label1 ~ Label10 に変化します。
以下のようなサブルーチンを記述して、
Sub RedAndYellow(k As Integer)
For i = 1 To 10
Dim RedYellowLabel As Control = FindControl(Me, "Label" + i.ToString)
If i Mod 2 = k Then
RedYellowLabel.BackColor = Color.Red
Else
RedYellowbel.BackColor = Color.Yellow
End If
Next
End Sub
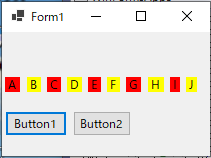
Private Sub Button1_Click(sender As Object, e As EventArgs) Handles Button1.Click
RedAndYellow(1)
End Sub
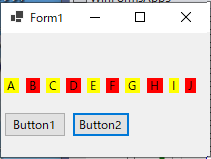
Private Sub Button2_Click(sender As Object, e As EventArgs) Handles Button2.Click
RedAndYellow(0)
End Subボタン1を押すと末尾が奇数番号のLabel は赤に、偶数のLabelは黄色になります。
ボタン2を押すと、上記の逆になります。
Size , Location の変更
Control.Location = New Point(座標X , 座標Y ) で Control の位置を変更出来ます。
Control.Size = New Size(サイズX , サイズY ) で Control の大きさを変更できます。
RedYellowLabel.Location = New Point(RedYellowLabel.Location.X, 15)
RedYellowLabel.AutoSize = False
RedYellowLabel.Size = New Size(30, 30)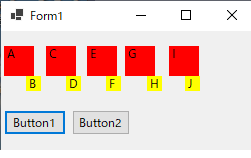
多数のControlを配置して、それを名前順に整列して並べたい場合、デザイナー画面での作業では大変です。以下の様に取り敢えず、コピペでその数だけcontrolを配置します。

次のコードで、Formのロード時に整列させます。
   Dim i As Integer
        For y = 27 To 355 Step 41

            For x = 10 To 330 Step 40
                i += 1
                Dim TBox As Control = FindControl(Me, "TextBox" + i.ToString)
                TBox.Location = New Point(x, y)
            Next

        Next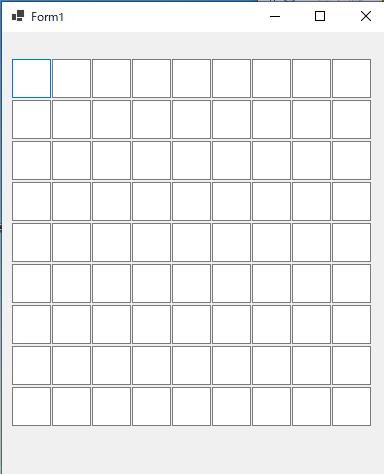
フォントの変更
RedYellowLabel.Font = New Font("Yu Gothic UI", 20.25F, FontStyle.Bold)RedYellowLabel.Font = New Font(("Yu Gothic UI", 9.0F, FontStyle.Regular)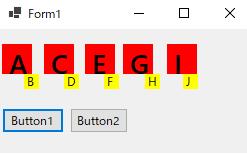
RedYellowLabel.Font = New Font("Yu Gothic UI", 20.25F, FontStyle.Bold Or FontStyle.Strikeout)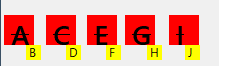
音(Wave)を鳴らす
Wave ファイルを埋め込む
先ず、wave ファイルをプロジェクトのリソースに取り込みます。
プロジェクト(P) -> コンポーネントの追加
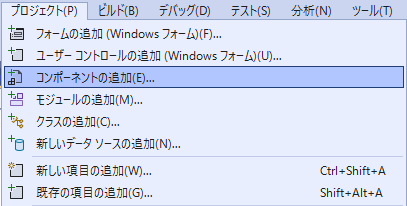
リソース ファイル を選択して追加
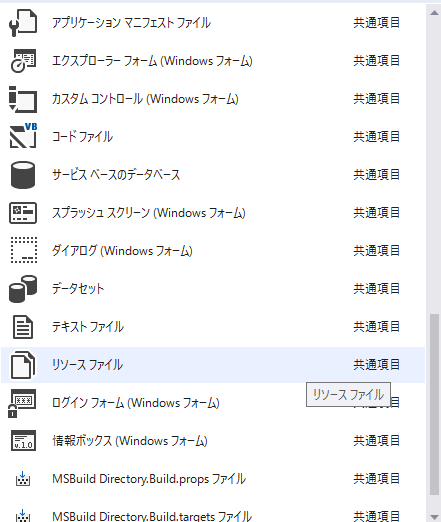
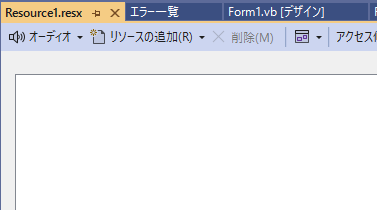
左上の文字列 となっている項目をオーディオに変更
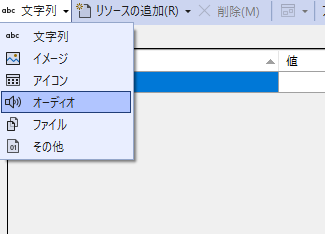
リソースの追加(R) をクリック
.wav を追加します。

リソース ファイルからリソースを取り出す
前項で追加したリソース ファイルの名前は、Resource1.resx 、それに追加した wave ファイルは、jump06.wav です。 My.Resources.Resource1.jump06 で取り出せます。
Dim strm As System.IO.Stream = My.Resources.Resource1.jump06Playerを定義して、Play と後処理
        '同期再生する
        Dim player As New System.Media.SoundPlayer(strm)
        player.PlaySync()
        '後始末
        player.Dispose()
ファイル ダイアログ
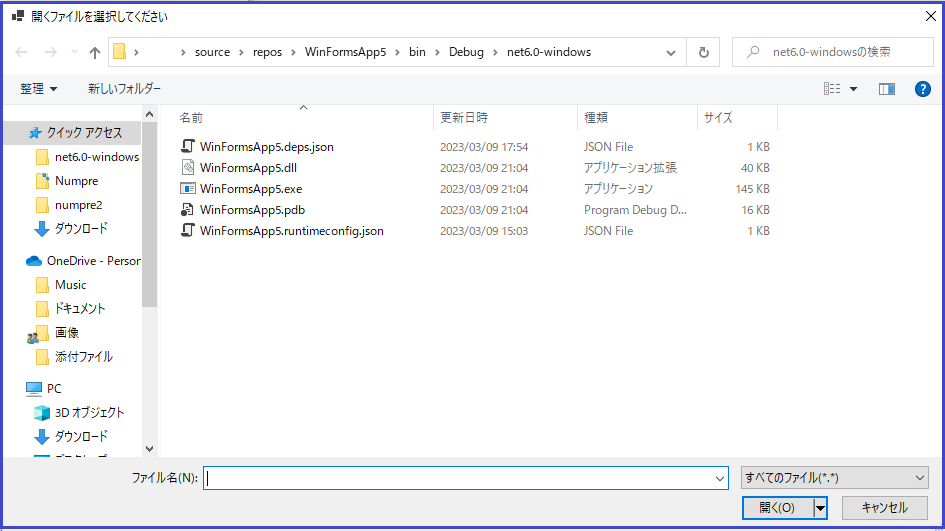
ファイル選択用 ダイアログ を表示しファイルを開く
以下のようなファイル選択のためのダイアログを表示します。
 Dim openFileDialog1 = New OpenFileDialog() With {.InitialDirectory = CurDir(),
        .Filter = "すべてのファイル(*.*)|*.*|ナンプレ問題ファイル(Numpre*.txt;*.txt)|Numpre*.txt;*.txt",
        .Title = "開くファイルを選択してください",
        .RestoreDirectory = True,
        .CheckFileExists = True,
        .CheckPathExists = True
        }
If openFileDialog1.ShowDialog() = DialogResult.OK Then

            MsgBox(openFileDialog1.FileName)

        End If
ファイル選択後の処理
ファイルが選択され、開く(O) が押されたかを判断し処理を記述します。
    If openFileDialog1.ShowDialog() = DialogResult.OK Then

            MsgBox(openFileDialog1.FileName)

        End If
ファイル保存用 ダイアログを表示しファイルを保存する
Dim sfd As New SaveFileDialog With {
            .FileName = "Numpre*.txt",
            .InitialDirectory = CurDir(),
            .Filter = "Numpreファイル(Numpre*.txt)|*.txt|すべてのファイル(*.*)|*.*",
            .FilterIndex = 1,
            .Title = "保存先のファイルを選択してください",
            .RestoreDirectory = True,
            .OverwritePrompt = True,
            .CheckPathExists = True
        }
      If sfd.ShowDialog() = DialogResult.OK Then
            Dim stream As System.IO.Stream
            stream = sfd.OpenFile()
            If Not (stream Is Nothing) Then
                'ファイルに書き込む
                Dim sw As New System.IO.StreamWriter(stream)
                sw.Write(Form2.TextBox1.Text)
                '閉じる
                sw.Close()
                stream.Close()

            End If

        End If
List 変数
次のような数値が3x3のブロックに入っている状況をブロック毎に処理したい場合、List 変数にIndexを代入して処理すると便利です。
111222333
111222333
111222333
444555666
444555666
444555666
777888999
777888999
777888999
List 変数の宣言
次のようにList変数の宣言と値の代入をします。
Dim Blocks As New List(Of Integer())

Blocks.Add({1, 2, 3, 10, 11, 12, 19, 20, 21})
Blocks.Add({4, 5, 6, 13, 14, 15, 22, 23, 24})
Blocks.Add({7, 8, 9, 16, 17, 18, 25, 26, 27})
Blocks.Add({28, 29, 30, 37, 38, 39, 46, 47, 48})
Blocks.Add({31, 32, 33, 40, 41, 42, 49, 50, 51})
Blocks.Add({34, 35, 36, 43, 44, 45, 52, 53, 54})
Blocks.Add({55, 56, 57, 64, 65, 66, 73, 74, 75})
Blocks.Add({58, 59, 60, 67, 68, 69, 76, 77, 78})
Blocks.Add({61, 62, 63, 70, 71, 72, 79, 80, 81})
for each で List 変数を使う
for each で List変数 Blocks() の中の Integer を Array() の Index として使い処理します。
        Dim BlData As String = ""
        Dim Cn As Integer
        For k = 0 To 8
            For Each q As Integer In Blocks(k)
                BlData += Array(q - 1)
                Cn += 1
                If Cn = 9 Then
                    Debug.WriteLine(BlData)
                    Cn = 0
                    BlData = ""
                End If

            Next
        Next
結果は、各ブロック毎のデータが出力されます。
111111111
222222222
333333333
444444444
555555555
666666666
777777777
888888888
999999999
スレッド 0x1d9c はコード 0 (0x0) で終了しました。
プログラムのICONを設定する
作成したプログラムをインストールすると、以下のように味気ない表示になってしまいます。

プログラムのICONを設定することにより、少しはましな表示に出来ます。
ICONは、以下の手順で設定出来ます。
メニューのプロジェクト(P) –> xxxのプロパティ(P)
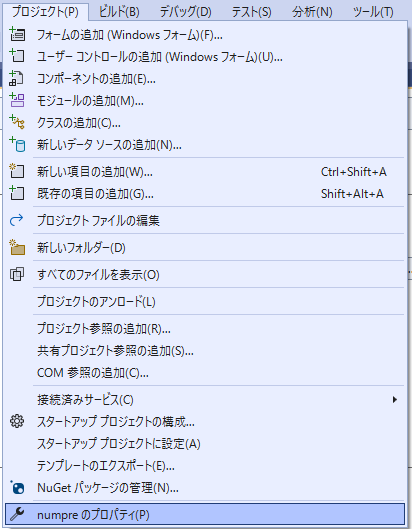
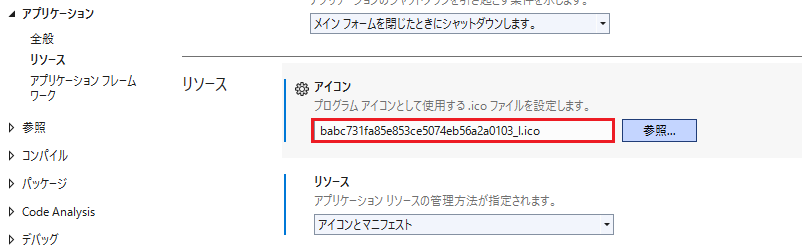
出て来たプロジェクトのプロパティからリソースの項目のアイコンで .ico ファイルを設定します。
公開するパッケージにファイルを含める
カレントディレクトリにファイルを含めてパッケージを公開したい場合は、以下の手順でファイルをパッケージ含めます。
含めたいファイルを .sln ファイルと同じディレクトリに置きます。
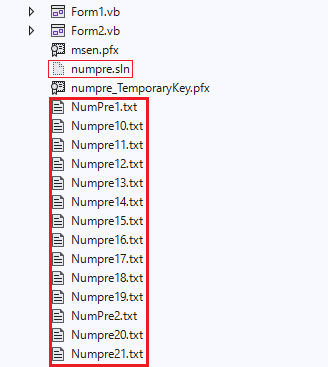
ソリューションエクスプローラから目的のファイルを右クリックして、ファイルのプロパティを表示します。プロパティで、 ビルドアクション なし -> コンテンツ に変更します。
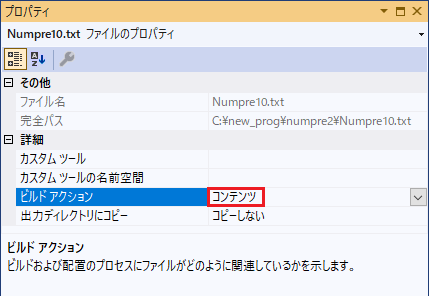
これで、ファイルが発行したパッケージのカレントディレクトリに出力されます。
PowerShell を立ち上げてコンソールに出力する
Powershell を立ち上げる
 Dim ProcID As Integer
 ' Start Windows Powershell , and store the process id.
 ProcID = Shell("powershell.EXE", AppWinStyle.NormalFocus)
アクティベイト出来るまで待つ
        ' Activate Windows powershell .
        Dim ti As Integer
WaitO:  On Error GoTo 0
        On Error GoTo WaitO
        System.Threading.Thread.Sleep(380)
        ti += 1
        AppActivate("Windows Powershell")
        On Error GoTo 0
PowerShell にキーストロークを送る
        ' Send the keystrokes to the Windows Powershell.
        My.Computer.Keyboard.SendKeys(ti.ToString + "{enter}", True)
        My.Computer.Keyboard.SendKeys("./test2.ps1 {Enter}", True)
上記コードの実行結果です。
PS >1
1
PS >./test2.ps1
689 4   5
23
   92
  6738
  7   4
  2    7
  1   9
       1
 5   6
PS >
